
Setting up the player’s weapon controls.
In this tutorial we’ll create a schematic to control the player’s weapon and moving the fired bolt. The schematic will be simple and can be reused later to fire the enemy shots as well.
Fire Shot: Schematic #
First, we’ll create the schematic to fire the weapon. The schematic will simply spawn a prefab and wait for the fire rate to pass. The player input firing the weapon is handled by an Interaction Machine component we’ll use to play the schematic.
Open the Makinom editor, navigate to Schematics and create a new schematic. Change the following settings.

Settings #
The start node is used for basic setup of a schematic and to add actors and resources. We’ll add a prefab resource to make use of the game object pools we’ve set up, and an audio clip resource. Using resoruces also allows us to override the prefabs and audio clips and reuse the schematic for the enemy ship.
Prefabs #
Click on Add Prefab Resource to add a prefab resource. Make sure that Destroy Prefabs is disabled.
- Prefab
Select Bolt.
The prefab can be found at Assets/Tutorial Resources/Prefabs/. - Use Pooling
Enable this setting.
Audio Clips #
Click on Add Audio Clip Resource to add an audio clip resource.
- Audio Clip
Select weapon_player.
The clip can be found at Assets/Tutorial Resources/Audio/.
Spawn Prefab #
Add Node > Game Object > Prefab > Spawn Prefab
This node will spawn the prefab. We’ll spawn it at a child object of the player.
- Prefab
Select Prefab 0: Bolt. - Target Type
Select Object.
Target Object #
- Object
Select Machine Object. - Child Object
Set to Shot Spawn. - Local Space
Enable this setting. - Offset
Set to X=0, Y=0, Z=0. - Use Rotation
Enable this setting. - Rotation Offset
Set to X=0, Y=0, Z=0.
Audio Settings #
- Play Audio
Enable this setting. - Audio Clip
Select 0: weapon_player. - Play One Shot
Enable this setting. - Volume
Set to 1.
Wait #
Add Node > Base > Wait
This node waits for a defined amount of seconds. We’ll use it to wait for the fire rate (object variable).
- Time (s)
Select Variable > Float Variable. - Variable Key
Set to fireRate. - Variable Origin
Select Object. - Object
Select Machine Object.
And that’s it for the schematic – click on Save Schematic and save it as FireShot in Assets/Schematics/.
Fire Shot: Interaction Machine #
Now, we’ll add an interaction machine component to the player’s game object. Select the game object in the scene and add the component (e.g. using the component menu: Makinom > Machines > Interaction Machine). Change the following settings.
Start Settings #
- Key Press
Enable this setting. - Input Key
Select Fire.
Machine Execution Settings #
- Schematic Asset
Select FireShot. - Execution Type
Select Single. - Update Type
Select Update.
And that’s it for the player for now. Click on Overrides > Apply All (top of the inspector) to apply the changes to the prefab.
Mover: Schematic #
Next, we’ll create a schematic to move a game object forward. This will be used to move the bolts, asteroids and enemy ships.
Open the Makinom editor, navigate to Schematics and create a new schematic. Change the following settings.

Settings #
We’ll set up a local variable as Machine Start Variable for easy setup in the machine component at a later time. When using the schematic in a machine component, the defined start variables will be added automatically, using their default values.
Machine Start Variables #
Click on Add Start Variable to add a local start variable that will be exposed to the machine component’s inspector.
- Variable Key
Set to speed. - Type
Select Float.
Vector3 Multiply #
Add Node > Value > Vector > Vector3 Multiply
This node will multiply a Vector3 value with a float value and store it into a Vector3 variable.
We’ll use a game object’s forward direction, multiply it by the movement speed (will be defined as start variable in the machine component) and store it into a local Vector3 variable. This will be the velocity used to move the game object.
Variable Settings #
- Variable Key
Set to velocity. - Variable Origin
Select Local. - Operator
Select Set.
Vector3 Value #
- Vector3 Type
Select Game Object > Game Object.
This will use a Vector3 value of a game object, e.g. the position. - Object
Select Machine Object. - Value Origin
Select Direction > Forward.
Multiply By #
- Multiply By
Select Variable > Float Variable. - Variable Key
Set to speed. - Variable Origin
Select Local.
Rigidbody Change Velocity #
Add Node > Game Object > Rigidbody > Rigidbody Change Velocity
This node will set the velocity of a rigidbody component. We’ll set the game object’s velocity to the Vector3 value we’ve just stored into the local Vector3 variable velocity.
Rigidbody Object #
- Object
Select Machine Object.
Velocity #
- Vector3 Type
Select Vector3 Variable. - Variable Key
Set to velocity. - Variable Origin
Select Local.
And that’s it for the schematic – click on Save Schematic and save it as Mover in Assets/Schematics/.
Mover: Auto Machine #
The Mover schematic will be added using an Auto Machine component. The schematic will set the game object’s velocity when it’s added to the scene.
We’ll add it to the Bolt prefab (found at Assets/Tutorial Resources/Prefabs/), add an auto machine component (e.g. using the component menu: Makinom > Machines > Auto Machine). Change the following settings.
Start Settings #
- Enable
Enable this setting.
This will start the schematic each time the game object is enabled, i.e. also when our pooled prefabs are reused.
Machine Execution Settings #
- Schematic Asset
Select Mover. - Execution Type
Select Single. - Update Type
Select Fixed Update.
Local Start Variables #
The Machine Start Variable we’ve set up in the schematic is automatically added here, so all we need to do is adjust it to our needs. Make sure the variable is enabled.
- speed
Set to 20.
And that’s it for the Bolt prefab for now. Since we added the component directly to the prefab, we don’t need to apply the changes.
Boundary Exit: Schematic #
Currently, the fired bolts would continue flying, leading to more and more prefabs being instantiated and increasing the game object pool.
To prevent this, we’ll create a simple prefab that will disable all objects that exit a trigger – the boundary of the level. Open the Makinom editor, navigate to Schematics and create a new schematic. Change the following settings.
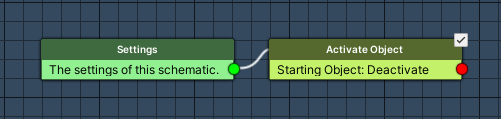
Activate Object #
Add Node > Game Object > Game Object > Activate Object
This node will enable and disable game objects. We’ll use it to disable the game object that started the machine (i.e. whatever left the trigger).
- Set Active
Disable this setting.
The game object will be disabled. - Object
Select Starting Object.
And that’s it for the schematic – click on Save Schematic and save it as BoundaryExit in Assets/Schematics/.
Boundary Exit: Trigger Machine #
Select the Boundary game object in the scene’s hierarchy. The game object has a collider (used as trigger) set up around the level.
We’ll use a Trigger Machine component to check for game objects that left the trigger. Add the component to the game object (e.g. using the component menu: Makinom > Machines > Trigger Machine). Change the following settings.
Start Settings #
- Trigger Exit
Enable this setting. - Start By Other (Starting Objects)
Enable this setting.
The machine can also be started by other game objects than the player.
Machine Execution Settings #
- Schematic Asset
Select BoundaryExit. - Execution Type
Select Multi.
The machine needs to be able to run multiple times at the same time, in case many objects exit it at the same time. - Update Type
Select Update.
And that’s it for now – don’t forget to save the scene.
Testing #
Click on Play to test the game. You’ll now be able to fire bolts, which will move upwards. Once the bolts leave the boundary, they’ll be disabled and can be reused in the game object pool.
The next tutorial will handle hit and destroy.


