Makinom - Game Toolkit for Unity
  • Features
  • Showcase
  • Guide
    • Documentation
    • Tutorials
    • Extensions
    • API
  • Makinom 1
    • Tutorials
    • Plugins
    • API
  • Support
  • Forum
  • Get Makinom

Guide

Getting Started

  • Introduction
  • First Steps
  • Game Starters
  • Components Overview
  • Upgrading a Makinom 1 Project

Editor

  • Makinom Editor Overview
  • Node Editor
  • Asset Sources
  • Editor Section
  • Base/Control Section
  • Game Section
  • UI Section
  • Templates Section

Features

  • Schematics
  • Dialogue Importer
  • Schematic Nodes
  • Formula Nodes
  • Languages
  • Input Keys
  • Audio and Music
  • Game States
  • Pooling
  • Saving Game Objects
  • Scene Objects
  • Save Games
  • Variables
  • Selected Data

Machines

  • Machine Components Overview
  • Animation Machine
  • Animation State Machine
  • Application Machine
  • Auto Machine
  • Collision Machine
  • Global Machine
  • Interaction Machine
  • Render Machine
  • Tagged Machine
  • Template Machine
  • Tick Machine
  • Trigger Machine

UI System

  • UI System Overview
  • UI Layers
  • UI Layouts
  • UI Boxes
  • HUDs
  • Flying Texts
  • Text Codes
  • Unity UI Module
  • HUDs: Content Providers
  • HUDs: Conditions
  • HUDs: Click Actions

Scripting

  • Scripting Overview
  • Code Extensions
  • Custom Save Data
  • Custom Component Save Data
  • Custom Nodes
  • Starting a Schematic

Advanced Topics

  • Build Troubleshooting
  • Performance Optimizations
  • Home
  • Guide
  • Documentation
  • UI System
  • UI System Overview

UI System Overview

Table of Contents
  • Changing the UI Module
  • UI Modules
    • None
    • Unity UI

Makinom 2’s UI system is modular and can be completely replaced with custom UI solutions.

The UI system itself is part of Makinom 2’s core functionality, but the actual displaying part is handled by external UI system modules – this allows the used UI system to be swapped out completely.

UI modules are imported into the Makinom 2 DLL folders:

  • Assets/Gaming Is Love/Makinom 2/DLL/
  • Assets/Gaming Is Love/Makinom 2/DLL/Editor/

They have to be in the same folder as Makinom 2’s DLLs to ensure the correct compile order by Unity.

Currently, there’s only one UI module available (and included in a fresh import of Makinom 2): Unity UI, using Unity’s component based UI system.

Changing the UI Module #

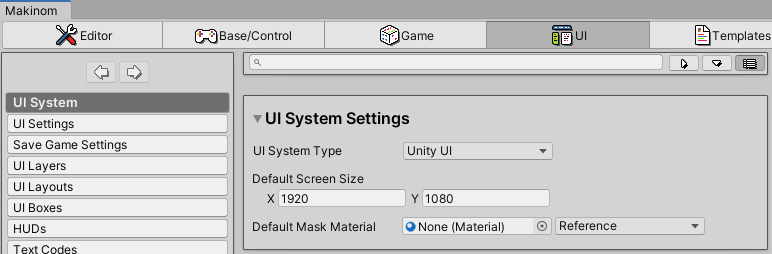
To change the used UI module, go to UI > UI System in the Makinom editor and select it in the UI System Type. The available modules depend on the UI modules you’ve imported in your Unity project.

Changing the UI system will prompt a confirmation dialogue:

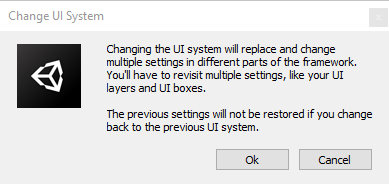
Using a different UI system will cause UI related settings to change, discarding previous setup. This is mainly the case in UI boxes and HUDs, where part of their setup depends on the used UI system, but can also impact the setup of UI related schematic nodes.

UI Modules #

See a short list and description of the available UI modules below.

None #

This is the default UI module of a new Makinom project and is part of Makinom’s core functionality (i.e. not a separate DLL). If you don’t want to use any UI in Makinom (e.g. using your own UI system without having Makinom manage it), you can use the None UI system type in UI > UI System.

While you can still set up some UI related things (e.g. UI boxes or HUDs), they’ll not display anything and be skipped over (e.g. when displaying a dialogue in a schematic).

Unity UI #

Unity UI is Unity’s component-based UI system. When using the Unity UI module for Makinom 2’s UI system, the look and layout of your UI boxes or HUDs is set up in the Unity scene view, creating prefabs to use in Makinom’s UI boxes, HUDs and flying texts.

Using the Unity UI requires the TextMesh Pro package to be added to the project via the Unity package manager – if you’re using Unity 2019.3 or newer, you’ll also need the Unity UI package. Both packages are usually added in a new Unity project automatically.

You can do the basic setup via the scene view’s context menu: Makinom > UI > UI Box for UI boxes and Makinom > UI > HUD for HUDs (both are also available via UI > Makinom).

Editor, UI
Share This Article :
  • Facebook
  • Twitter
  • LinkedIn
  • Pinterest
Updated on January 15, 2021
Table of Contents
  • Changing the UI Module
  • UI Modules
    • None
    • Unity UI
Sitemap
  • Features
  • Showcase
  • Guide
    • Documentation
    • Tutorials
    • Extensions
    • API
  • Makinom 1 Hub
    • Tutorials
    • Plugins
    • API
  • Support
  • Forum
  • Get Makinom
  • Contact
  • Blog
  • ORK Framework
  • gamingislove.com
Categories
  • Makinom 1 (97)
    • Tutorial (97)
      • 2D Platformer (14)
      • 2D Roguelike (8)
      • Breakout (6)
      • How-to (34)
      • Match 3 (6)
      • Schematic (4)
      • Scripting (6)
      • Space Shooter (11)
      • Survival Shooter (8)
  • News (11)
  • Release (68)
Search

© 2015 Gaming is Love e.U.

Disclosure: This site may contain affiliate links, which means I may receive a commission if you click a link and purchase something that I have recommended. While clicking these links won’t cost you any money, they will help me fund my development projects while recommending great assets!