
To compile the source code into the Makinom.dll used by your Unity project, you need to set up the references in MonoDevelop.
The references are set up in the Solution View of MonoDevelop.

In the Framework project of the Makinom Gameplay solution, either double click References or right click and select Edit References. This will open the reference editor.

You need to add 5 references:
- UnityEngine.dll
Can be found in your Unity installation folder.
Windows: Editor/Data/Managed/UnityEngine.dll
Mac OSX: Unity.app/Contents/Frameworks/UnityEngine.dll - UnityEngine.UI.dll
Can be found in your Unity installation folder.
Windows: Editor/Data/UnityExtensions/Unity/GUISystem/Standalone/UnityEngine.UI.dll
Mac OSX: Unity.app/Contents/UnityExtensions/Unity/GUISystem/Standalone/UnityEngine.UI.dll
- UnityEngine.Networking.dll
Can be found in your Unity installation folder.
Windows: Editor/Data/UnityExtensions/Unity/Networking/UnityEngine.Networking.dll
Mac OSX: Unity.app/Contents/UnityExtensions/Unity/Networking/UnityEngine.Networking.dll - UnityEngine.Timeline.dll
Can be found in your Unity installation folder.
Windows: Editor/Data/UnityExtensions/Unity/Timeline/Runtime/UnityEngine.Timeline.dll
Mac OSX: Unity.app/Contents/UnityExtensions/Unity/Timeline/Runtime/UnityEngine.Timeline.dll
Please note that the DLL isn’t available in Unity 5.6. - MakinomCore.dll
Comes with the Makinom package.
After import, it can be found in your Unity project in Assets/Makinom/DLL/.
Since this is most likely the first time you’re adding them, you need to select the .Net Assembly tab and locate the DLL files in the file browser. Add them by either double clicking or selecting them and clicking on the Add button. Once you’ve added all three DLLs, you can confirm the changes by clicking on OK. Please note that you also need to have the System reference in the project, this should already be added by default.
Your solution view should now look like this:
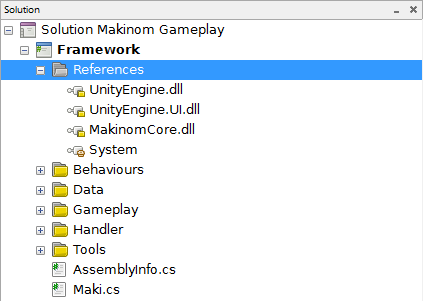
You’re now able to compile the project.
When the compilation has been successfull, you can find the Makinom.dll in bin/Release/ in the solution’s folder.
Copy the Makinom.dll into your Unity project to Assets/Makinom/DLL/ and replace the already existing one.
Compiling for different Unity versions
When compiling for one of the supported Unity versions, make sure to use the correct DLL files from that version and the correct build configuration:
- Unity 5.6
Use the Unity_5_6 build configuration. - Unity 2017
Use the Unity_2017 build configuration. - Unity 2018
Use the Unity_2018 build configuration.
In MonoDevelop, the build configuration can be changed in the upper left of the menu.
Tip: Automatic distribution
You can use Custom Commands in MonoDevelop to automatically place the newly compiled DLL in your project.
This can be done using batch files that’ll copy the DLL for you – the batch file can be executed as a custom command after building the DLL. You can add custom commands in the Project Options of the Framework project. You can open the options by double clicking on the project (or by double clicking and selecting Options).
Tip: Using Visual Studio
When using Visual Studio, make sure to use the Visual Studio Tools for Unity extension (should come with Unity).
To set up the correct target framework, open the properties of the Framework project (right-click on Framework and select Properties in the context menu). In the Application section of the properties, selec the Unity 3.5 .net Subset Base Class Libraries as the Target Framework.