
This simple schematic is used to set a game object in the scene to be the player.
When not spawning the player through Makinom (using the Player Settings in Game > Game Settings), you can set a game object in the scene to be the player using the Set Player node.
Setting a game object to be the player isn’t required, but can be useful for your game mechanics. This allows checking if a game object is the player or starting collider/trigger machines only by the player.
Setting up the Schematic
Open the Makinom editor and navigate to Schematics. Create a new schematic, there are is no additional setup needed in the Settings.
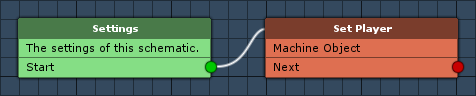
Set Player
Add > Game > Player > Set Player
This node will set a game object to be the player.
- Destroy Old Player
Enable this setting. - Player Object
Select Machine Object.
We’ll set the machine’s game object to be the player.
And that’s it for the schematic. Click on Save Schematic to save it, e.g. as SetPlayer.
Using the Schematic
Now that you’ve got a schematic that sets a game object to be the player, you can use it whenever needed.
Auto Machine
The most common use case is having an auto machine on the game object that should be the player. Add an auto machine component to the game object (e.g. using the scene wizard: Add Machine > Auto Machine) and change the following settings.
Start Settings
- Start
Enable this setting. - Enable
Enable this setting.
Machine Execution Settings
- Asset Type
Select Schematic. - Schematic Asset
Select your schematic setting the player (e.g. SetPlayer).
The rest of the execution settings can use the default values:
- Execution Type
Select Single. - Update Type
Select Update.