
Setting up the turn based mechanic and a HUD.
In this tutorial we’ll set up the game manager, which will handle our simple turn based game mechanic. Also, we’ll set up the HUD to display the player’s food.
Food HUD
First, we’ll set up the food HUD. Open the Makinom editor, navigate to Menus > HUDs and change the following settings in the already added default HUD.
HUD Settings
- Name
Set to Food HUD. - GUI Box
Select HUD. - HUD Type
Select Information.
Display Conditions
- Auto Display
Enable this setting.
Click on Add Game State to add a game state condition.
- Condition Type
Select Game State. - Game State
Select Changing Scene. - Check State
Select Inactive.
The HUD will be hidden while changing scenes.
Information Element 0
Click on Add Information Element to add an element to this HUD.
- Element Type
Select Information. - Text (English)
Set to:
Food: <var.int=food> - Variable Origin
Select Global. - Element Bounds
Set to X=0, Y=0. - Width
Set to 100. - Is Percent (Width)
Enable this setting. - Height
Set to 100. - Is Percent (Height)
Enable this setting.
That’s it for the HUD – click on Save Settings to save the changes.
Game Manager: Schematic
Next, we’ll create the schamtic handling the turn based game mechanic. The game manager will be started by a tick machine when the player isn’t in control.
Navigate to Schematics, create a new schematic and change the following settings.
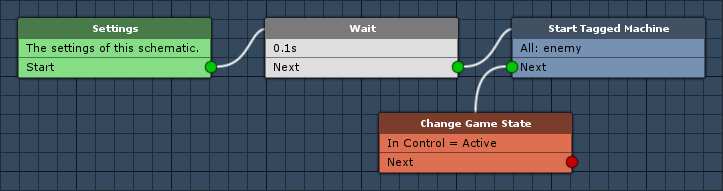
Wait
Add > Base > Wait
WWe’ll use this node to wait for 0.1 seconds to have a small timeout between the player’s turn and the enemies.
- Time (s)
Set to 0.1.
Start Tagged Machine
Add > Machine > Start Tagged Machine
We’ll use this node to start all tagged machines in the scene with the tag enemy. This will cause the enemies to make their move (using a schematic we’ll set up later).
- Share Local Variables
Disable this setting. - Wait
Enable this setting. - Single Execution
Enable this setting.
This will let one enemy move at a time.
Machine Object
- All Machines
Enable this setting.
Starting Object
- Object
Select Machine Object.
Tag Settings
Click on Add Tag to add a starting tag.
- Tag
Set to enemy.
Change Game State
Add > Game > Game > Change Game State
We’ll use this node to start the player’s turn again by activating the In Control state.
Click on Add Game State to add a game state change.
- Game State
Select In Control. - Set State
Select Active.
That’s it for the schematic – click on Save Schematic and save it as GameManager in Assets/Schematics/.
Game Manager: Tick Machine
Finally, we’ll add the game manager schematic to the GameManager game object using a tick machine. The schematic will try to start each frame, but will only be able to when the player isn’t in control (and the game is running). This results in the player and enemies making their move turn after turn.
Add a tick machine component to the GameManager game object in the scene (e.g. using the component menu: Makinom > Machines > Tick Machine) and change the following settings.
Start Settings
- Update
Enable this setting. - Check Game States
Enable this setting. - Needed
Select All.
Click on Add Game State to add a game state condition.
- Condition Type
Select Game State. - Game State
Select In Control. - Check State
Select Inactive.
Click on Add Game State again to add another condition.
- Condition Type
Select Game State. - Game State
Select Game Running. - Check State
Select Active.
Machine Execution Settings
- Asset Type
Select Schematics. - Schematics Asset
Select GameManager. - Execution Type
Select Single. - Update Type
Select Update.
And that’s it for now – don’t forget to save the scene.
Testing
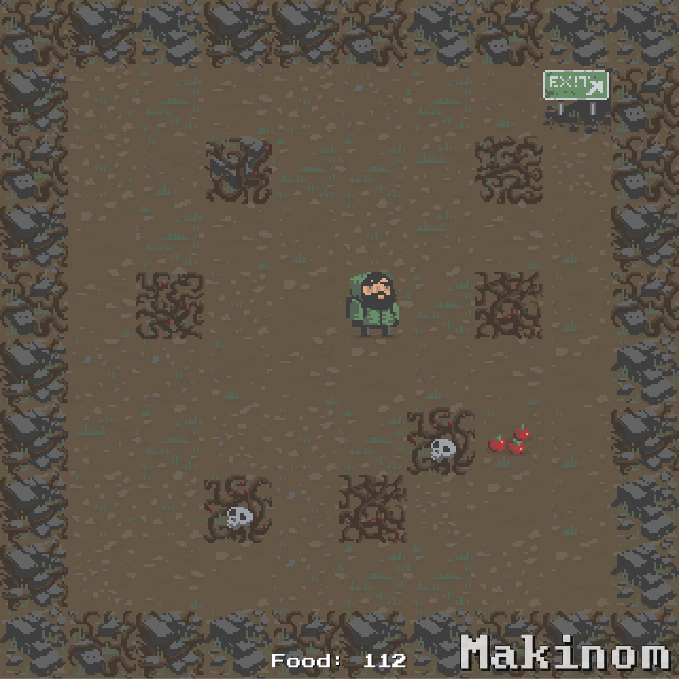
Click on Play to test the game. You’ll now be able to move through the level, chop down walls, collect food and move on to the next level through the exit. However, the enemies (which start spawning on day 2) are currently not moving or attacking the player …
The next tutorial will handle the enemy mechanics.