
Setting up the HUDs.
In this tutorial we’ll set up the health, score and bomb HUDs of the player. We’ve already created the GUI boxes we’re using in the 1st tutorial.
Health HUD
We’ll start with the Health HUD – it will be displayed at the position of our player and follow the game object as the player moves.
Open the Makinom editor, navigate to Menus > HUDs and change the following settings of the default HUD.
HUD Settings
- Name
Set to Health. - GUI Box
Select Health HUD. - HUD Type
Select Information.
The HUD User determines which game object will be used by the HUD. The game object can be e.g. used for object variables and displaying the HUD at the objects position.
- User
Select Player. - Display at Object
Enable this setting. - Offset
Set to X=0, Y=-50.
This will display the HUD above the player’s head.
Display Conditions
- Auto Display
Enable this setting.
Image Settings
We’ll display a background image in the HUD.
- Show Background
Enable this setting. - Relative Position
Enable this setting.
The image will be displayed relative to the used GUI box’ position - Relative To
Select Upper Left. - Image Bounds
Set to X=0, Y=0, W=100, H=30. - Use Image
Enable this setting. - Image
Select Health-bg.
The image can be found at Assets/Tutorial Resources/Sprites/_UI/. - Scale Mode
Select Stretch To Fill.
Information Element 0
Click on Add Information Element to add a HUD element to the HUD. We’ll display the player’s health as a bar, which will change color when falling below defined values.
- Element Type
Select Value Bar.
The Value defines the current value of the bar.
- Float Type
Select Int Variable. - Variable Key
Set to health. - Variable Origin
Select Object. - Game Object
Select User.
The Minimum Value and Maximum Value define the lower and upper value borders that will be displayed by the bar.
- Minimum Value
Set to 0 (Value). - Maximum Value
Set to 100 (Value).
The Value Bar Settings define how the bar will be displayed – we’ll fill the bar from left to right.
- Bar Filling
Select Left To Right.
Value Bar 0
Edit the already added value bar image settings.
- Percent
Set to 100.
The Bar Image defines how the filled bar will look like.
- Color
Set to a green color (e.g.: R=0, G=255, B=0, A=255).
The Empty Bar Image defines how the empty bar will look like.
- Use Empty Bar
Enable this setting. - Color
Set to a black color with some transparency (e.g.: R=0, G=0, B=0, A=100).
Value Bar 1
Copy the first value bar image settings and change the following settings.
- Percent
Set to 50.
We’ll use a different color when the bar is below 50 %.
- Color
Set to a yellow color (e.g.: R=255, G=255, B=0, A=255).
Value Bar 2
Copy the last value bar iamge settings and change the following settings.
- Percent
Set to 25.
We’ll use a different color when the bar is below 25 %.
- Color
Set to a red color (e.g.: R=255, G=0, B=0, A=255).
Element Bounds
- Position
Set to X=0, Y=0. - Anchor
Select Upper Left. - Relative To
Select Upper Left. - Width
Set to 100. - Is Percent (Width)
Enable this setting. - Height
Set to 20. - Is Percent (Height)
Disable this setting.
That’s it for the health HUD.
Score HUD
Next, we’ll add the Score HUD – it will display the player’s score.
Add a new HUD and change the following settings.
HUD Settings
- Name
Set to Score. - GUI Box
Select Score HUD. - HUD Type
Select Information. - User
Select None.
Display Conditions
- Auto Display
Enable this setting.
Information Element 0
Click on Add Information Element to add a HUD element.
- Element Type
Select Text. - English
Set to:
Score: <var.int=score> - Variable Origin
Select Global.
Element Bounds
- Position
Set to X=0, Y=0. - Anchor
Select Upper Left. - Relative To
Select Upper Left. - Width
Set to 100. - Is Percent (Width)
Enable this setting. - Height
Set to 100. - Is Percent (Height)
Enable this setting.
That’s it for the score HUD.
Bomb HUD
Finally, we’ll add the Bomb HUD – it will display a bomb image if the player has at least 1 bomb.
Add a new HUD and change the following settings.
HUD Settings
- Name
Set to Bomb. - GUI Box
Select Bomb HUD. - HUD Type
Select Information. - User
Select None.
Display Conditions
- Auto Display
Enable this setting.
Click on Add Variable to add a variable condition – we’ll check if the player has a bomb.
- Condition Type
Select Variable. - Variable Key
Set to bombs. - Variable Origin
Select Global. - Is Valid
Enable this setting. - Exists
Enable this setting. - Type
Select Int. - Check Type
Select Is Greater. - Check Value
Set to 0 (Value).
Information Element 0
Click on Add Information Element to add a HUD element.
- Element Type
Select Image. - Use Image
Enable this setting. - Image
Select prop_crate_ammo.
The image can be found at Assets/Tutorial Resources/Sprites/_Props/. - Scale Mode
Select Scale To Fit.
Element Bounds
- Position
Set to X=0, Y=0. - Anchor
Select Upper Left. - Relative To
Select Upper Left. - Width
Set to 100. - Is Percent (Width)
Disable this setting. - Height
Set to 100. - Is Percent (Height)
Disable this setting.
And that’s it for the HUDs – click on Save Settings to save the changes.
Testing
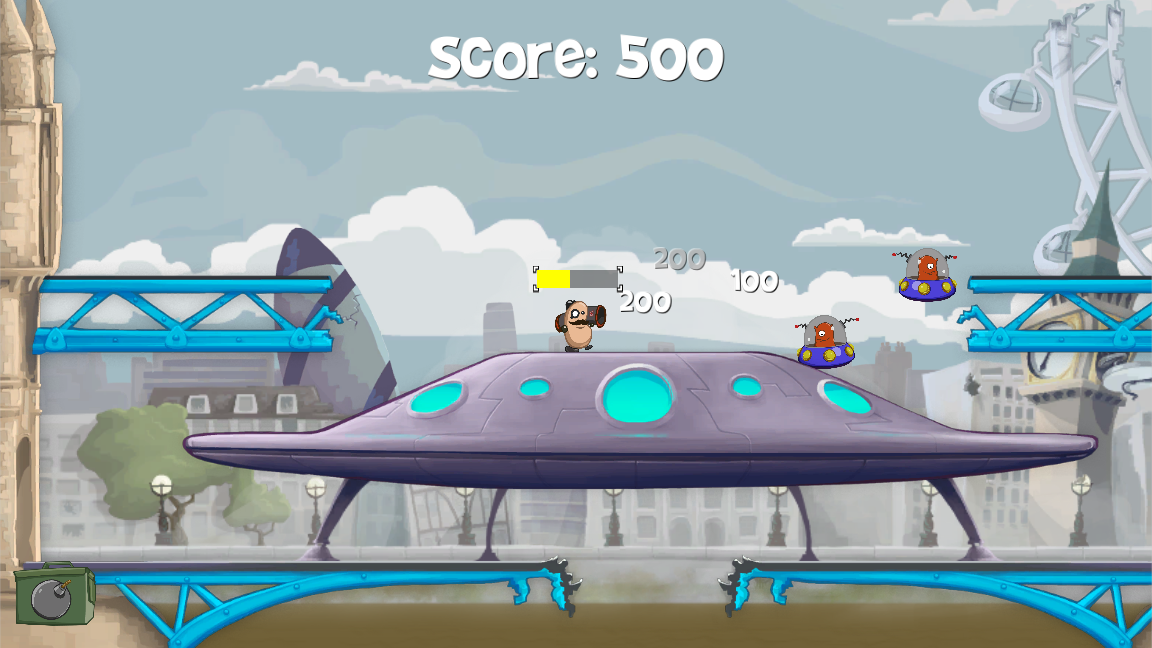
Click on Play to start the game. You’ll now see the player’s health HUD above the player and the score in the upper center of the screen. After collecting a bomb, you’ll see the bomb HUD in the lower left corner of the screen.
The next tutorial will handle the background animations.