
Setting up the schematic to randomly generate a jewel grid.
In this tutorial we’ll set up the schematic that creates our jewel grid and randomly fills it with jewels.
The grid’s size (rows and columns) will be defined by local start variables of the machine component playing the schematic. The grid’s actual height will be doubled, hiding the upper half of the grid – we’ll use this to achieve the effect of new jewels falling down from above.
Generate Level: Schematic #
First, we’ll set up the schematic to create the grid and fill it with random jewels.
Open the Makinom editor, navigate to Schematics and create a new schematic. Change the following settings.

Settings #
We’ll set up local variables as Machine Start Variables for easy setup in the machine component at a later time. When using the schematic in a machine component, the defined start variables will be added automatically, using their default values.
Machine Start Variables #
Click on Add Start Variable to add a local start variable that will be exposed to the machine component’s inspector.
- Variable Key
Set to rows. - Type
Select Int. - Default Value
Set to 10.
Copy the previous start variable.
- Variable Key
Set to columns.
Prefabs #
We need a prefab resource for handling our random jewels. Click on Add Prefab Resource to add a prefab resource.
- Name
Set to Jewel. - Use Order
Select Random.
We need 5 prefabs in this prefab resource, add the needed amount by clicking on Add Prefab.
- Prefab
Select blue, green, purple, red and yellow.
The prefabs can be found at Assets/Tutorial Resources/Prefabs/.
Change Variables #
Add Node > Value > Variable > Change Variables
We’ll use this node to store the doubled height (rows) of the grid.
Click on Add Variable to add a variable change.
- Change Type
Select Variable. - Variable Key
Set to doubleRows. - Variable Origin
Select Local. - Type
Select Int. - Operator
Select Set. - Float Type
Select Variable > Int Variable. - Variable Key
Set to rows. - Variable Origin
Select Local.
Copy the previous variable change and change the following settings.
- Operator
Select Multiply. - Float Value
Set to 2 (Value).
Create Grid #
Add Node > Game Object > Grid > Create Grid
We’ll use this node to set up the grid that holds our jewels. The Grid nodes are a convenient way to create, manage and manipulate 2D and 3D grids of game objects.
Each grid is identified by it’s grid key.
- Grid Key
Set to level.
Grid Size #
The grid size defines the columns (X), rows (Y) and dimensions (Z) of the grid.
- Vector3 Type
Select Value > Set Axis.
The X-Axis of the grid size defines the columns.
- Float Type
Select Variable > Int Variable. - Variable Key
Set to columns. - Variable Origin
Select Local.
The Y-Axis of the grid size defines the rows.
- Float Type
Select Variable > Int Variable. - Variable Key
Set to doubleRows. - Variable Origin
Select Local.
The Z-Axis of the grid size is used to create multidimensional grids, for our match 3 game we only need a 2D grid, i.e. a Z size of 1.
- Z-Axis
Set to 1 (Value).
Grid Position #
The grid position defines where the grid’s root (and by this, the cell at X=0, Y=0, Z=0) will be placed in the game world.
- Vector3 Type
Select Value. - Value
Set to X=0, Y=0, Z=0.
Cell Position #
The cell position defines the position offset between the cells of the grid.
- Vector3 Type
Select Value. - Value
Set to X=1, Y=1, Z=1.
Fill Grid Cells #
Add Node > Game Object > Grid > Fill Grid Cells
We’ll use this node to fill our (currently empty) grid with random jewels (prefabs).
- Prefab
Select Prefab 0: Jewel. - Fill Mode
Select Empty.
We’ll only fill empty cells. - Mount
Enable this setting.
The game objects will be mounted to the root game object of the grid (which was created with the grid).
Grid Settings #
- Grid Key
Set to level. - Grid Cells
Select Whole Grid.
Hide Grid Cells #
Add Node > Game Object > Grid > Hide Grid Cells
We’ll use this node to hide the upper half of the grid. The game objects assigned to hidden cells will be disabled – this helps us with our later added logic for finding matches.
- Hide/Unhide
Enable this setting.
The grid cells will be hidden. - Grid Key
Set to level. - Grid Cells
Select Limited Area.
We only want to hide a defined/limited area of the grid.
From Cell Index #
This defines the area’s starting index in the grid.
- Vector3 Type
Select Value > Set Axis. - X-Axis
Set to 0 (Value).
We’ll use the local int variable rows as Y-Axis starting index, this makes sure we’re hiding the upper half of the grid.
- Float Type (Y-Axis)
Select Variable > Int Variable. - Variable Key (Y-Axis)
Set to rows. - Variable Origin (Y-Axis)
Select Local. - Z-Axis
Set to 0 (Value).
To Cell Index #
This defines the area’s end index in the grid – all cells between the starting and end index will be used. Setting an axis to -1 will use the maximum index (i.e. the highest index) of the grid axis.
- Vector3 Type
Select Value. - Value
Set to X=-1, Y=-1, Z=0.
And that’s it for the schematic – click on Save Schematic and save it as GenerateLevel in Assets/Schematics/.
Generate Level: Auto Machine #
We’ll use an Auto Machine component to start our level generating schematic. Create a new game object in the scene (e.g. using the Unity menu: GameObject > Create Empty), rename it and move it out of the way.
- Name
Set to Level Generator. - Position
Set to X=-10, Y=1, Z=0.
Add an auto machine component to the game object (e.g. using the component menu: Makinom > Machines > Auto Machine) and change the following settings.
Start Settings #
- Start
Enable this setting.
Machine Execution Settings #
- Schematic Asset
Select GenerateLevel. - Execution Type
Select Single. - Update Type
Select Update.
Local Start Variables #
The Machine Start Variables we’ve set up in the schematic are automatically added here with their default values – since the default values are already what we need, we don’t have more to do here. Make sure all variables are enabled.
And that’s it for now – don’t forget to save the scene.
Testing #
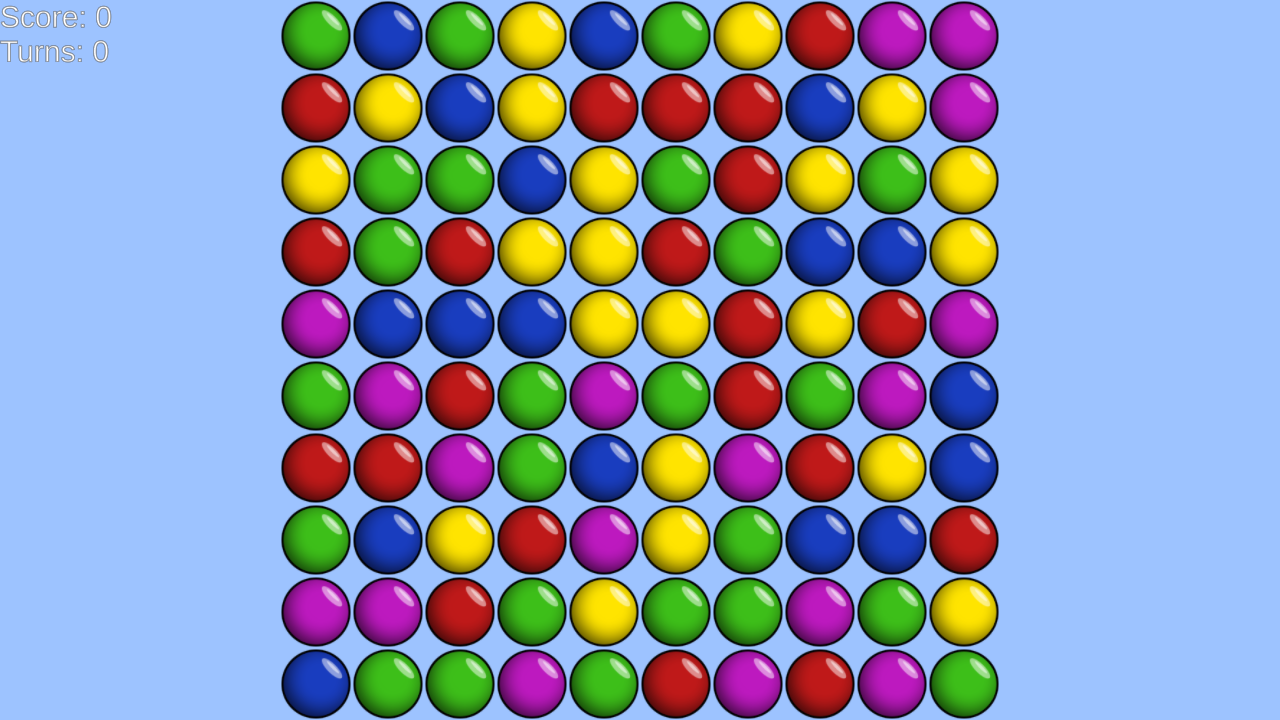
Click on Play to test the game. You’ll see a randomly created grid of jewels and the HUD (displaying score and turns of 0).
The next tutorial will handle matching jewels.


