
Setting up the turn based mechanic and UI prefabs.
In this tutorial we’ll set up the game manager, which will handle our simple turn based game mechanic. Also, we’ll set up the UI box we’re using and the HUD to display the player’s food.
UI Scene Setup #
If you remember, we’ve already set the Makinom project’s UI system to use the Unity UI module, i.e. we’ll do most of the setup in the scene, using components and the Unity UI. You can learn more about UI systems in general in this documentation, or about the Unity UI module in this documentation.
UI Box #
First, let’s set up the UI box, we’re already using it to show the day when loading the next level. At the end we’ll create a prefab out of our UI box setup and use it in the UI box in the Makinom editor.
Creating a UI Box #
The easiest way to set up a UI box is using the context menu in the scene hierarchy: Makinom > UI > UI Box > UI Box (TextMesh Pro)
Remove the Image and Vertical Layout Group components from the newly created UI box, we want to only show text, and at the center of the screen.
This already gives us all we need, but we can style it to our liking, e.g. change the position or size of the box, or change the font, font size or alignment.
Rect Transform #
We want the UI box to cover the whole screen.
- Anchors
Select the stretch stretch anchor preset. - Left, Top, Right, Bottom
Set to 0.
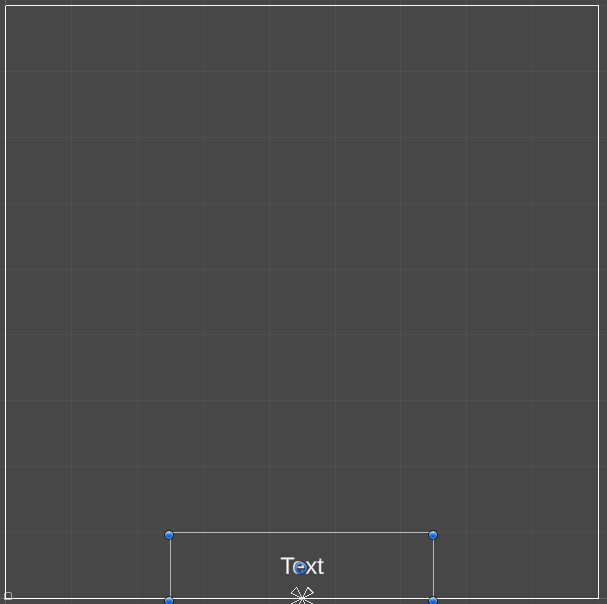
TextMesh Pro – Text (UI) #
I’ll change the text to be centered and use a larger font size – select the Text child object of the created UI Box game object and change the TextMesh Pro – Text (UI) component’s settings.
- Font Size
Set to 30. - Alignment
Select Center and Middle.
Also, set the Text child object’s Rect Transform to use the whole size of the UI box.
- Anchors
Select the stretch stretch anchor preset. - Left, Top, Right, Bottom
Set to 0.

That’s it for the UI box – now create a prefab out of it by dragging the UI Box game object from the scene hierarchy to the project view, e.g. into a new folder in Assets/Tutorial Resources/Prefabs/UI/.
Food HUD #
Now, we’ll set up the food HUD’s game object and components in the scene. At the end we’ll create a prefab out of our setup and use it in the HUD setup in the Makinom editor.
We’ll show them in the bottom center of the screen.
Use the context menu in the scene hierarchy to add a simple HUD: Makinom > UI > HUD > HUD
Rect Transform #
Change the newly created HUD’s Rect Transform:
- Width
Set to 400. - Height
Set to 100. - Anchors
Use the bottom center anchor preset.
Now move it to the bottom center of the canvas.
Add a HUD Text Content to the HUD using the scene hierarchy context menu: Makinom > UI > HUD > Content > Text Content (TextMesh Pro)
Adjust the new game object’s bounds to match the parent HUD’s bounds (or place it any way you like).
HUD Text Content Component #
This component is responsible for setting the TextMesh Pro component’s text in the HUD, we’ll use a Makinom text code to show the value of our lives int variable.
- Default Content
Set to:
Food: <var.int=food> - Variable Origin
Select Global.
You can display int variables using the text code <var.int=key>, replacing key with the variable key you want to show.
TextMesh Pro – Text (UI) #
We’ll use a larger font size – select the Text child object of the created Text Content game object and change the TextMesh Pro – Text (UI) component’s settings.
- Font Size
Set to 36. - Alignment
Select Center and Middle.
That’s it for the HUD – now create a prefab out of it by dragging the HUD game object from the scene hierarchy to the project view (e.g. into Assets/Tutorial Resources/Prefabs/).
With that we’re done with the setup of our UI prefabs, but we need to clean up the Canvas and Event System that where created by Unity for our UI setup in the scene. In the scene hierarchy, select the Canvas and EventSystem game objects and delete them (e.g. via the Delete key).
Using the UI Prefabs #
Next we need to use the UI prefabs we just set up in Makinom.
UI Box 0: Message #
Open the Makinom editor, navigate to UI > UI Box, select the Default UI box and change the following settings.
Base Settings #
- Name
Set to Message. - UI Layer
Select Above Screen Fader.
Unity UI #
- UI Box Prefab
Select the UI Box prefab we created.
That’s it for the UI box.
HUD 0: Health #
Navigate to UI > HUDs and select the Default HUD that’s already been added in the initial project setup. Change the following settings.
HUD Settings #
- Name
Set to Food. - HUD Type
Select Information. - Auto Display
Enable this setting.
Information Settings #
- User
Select None. - Display Without User
Enable this setting.
Display Conditions #
We don’t want to display this HUD while changing scenes.
Click on Add Game State.
- Condition Type
Select Game State. - Game State
Select Changing Scene. - Check State
Select Inactive.
Unity UI #
- UI Layer
Select Layer 1. - HUD Prefab
Select the HUD prefab we created.
And that’s it for the UI setup – click on Save Settings to save the changes.
Game Manager: Schematic #
Next, we’ll create the schamtic handling the turn based game mechanic. The game manager will be started by a tick machine when the player isn’t in control.
Navigate to Schematics, create a new schematic and change the following settings.

Wait #
Add Node > Base > Wait
WWe’ll use this node to wait for 0.1 seconds to have a small timeout between the player’s turn and the enemies.
- Time (s)
Set to 0.1.
Start Tagged Machine #
Add Node > Machine > Start Tagged Machine
We’ll use this node to start all tagged machines in the scene with the tag enemy. This will cause the enemies to make their move (using a schematic we’ll set up later).
- Share Local Variables
Disable this setting. - Wait
Enable this setting. - Single Execution
Enable this setting.
This will let one enemy move at a time.
Machine Object
#
- All Machines
Enable this setting.
We’ll start all tagged machines in the scene with a matching starting tag.
Starting Object #
- Object
Select Machine Object.
Tag Settings #
Click on Add Tag to add a starting tag.
- Tag
Set to enemy.
Change Game State #
Add Node > Game > Game > Change Game State
We’ll use this node to start the player’s turn again by activating the In Control state.
Click on Add Game State to add a game state change.
- Game State
Select In Control. - Set State
Select Active.
That’s it for the schematic – click on Save Schematic and save it as GameManager in Assets/Schematics/.
Game Manager: Tick Machine #
Finally, we’ll add the game manager schematic to the GameManager game object using a tick machine. The schematic will try to start each frame, but will only be able to when the player isn’t in control (and the game is running). This results in the player and enemies making their move turn after turn.
Add a tick machine component to the GameManager game object in the scene (e.g. using the component menu: Makinom > Machines > Tick Machine) and change the following settings.
Start Settings #
- Update
Enable this setting.
Machine Execution Settings #
- Schematics Asset
Select GameManager. - Execution Type
Select Single. - Update Type
Select Update.
Condition Settings #
Click on Add Condition, we’ll set up the game state condition here.
- Auto Check
Select None.
We don’t need to automatically check this when enabling or first initializing the game object.
The conditions will be checked upon each start of the machine anyway.
In the added Condition 0, we’ll set up our game state condition.
- Condition Type
Select Game State. - Needed
Select All.
Click on Add Game State.
- Condition Type
Select Game State. - Game State
Select In Control. - Check State
Select Inactive.
Copy the game state and change the following settings.
- Game State
Select Game Running. - Check State
Select Active.
And that’s it for now – don’t forget to save the scene.
Testing #
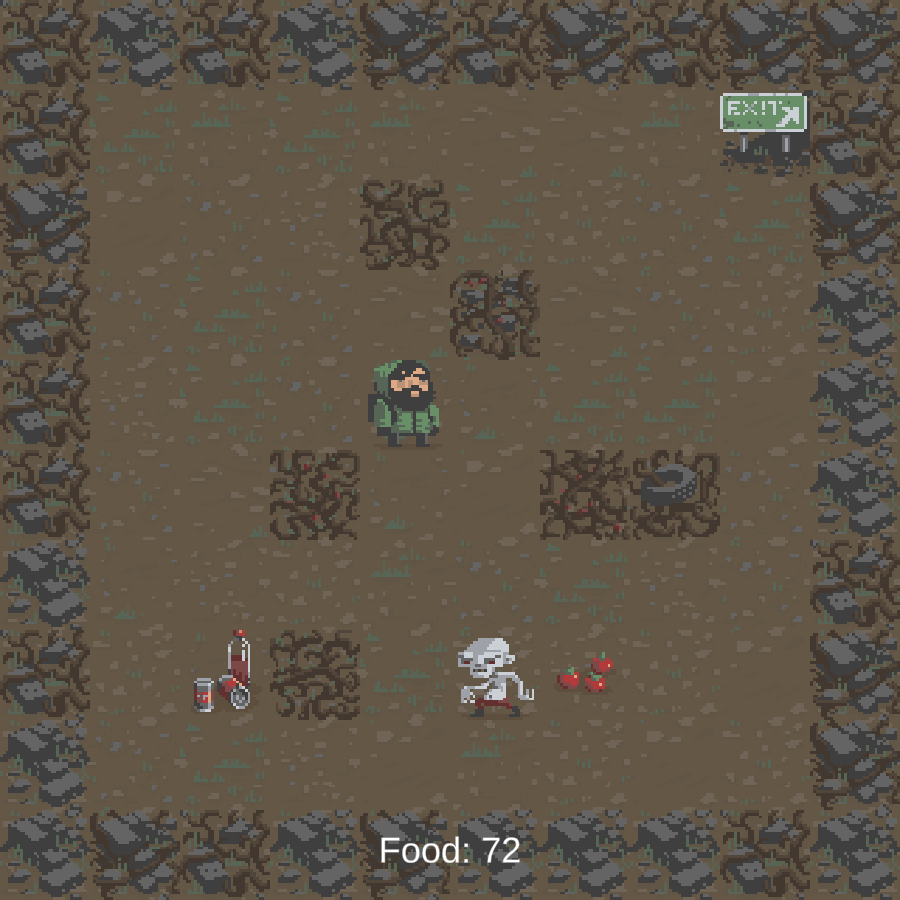
Click on Play to test the game. You’ll now be able to move through the level, chop down walls, collect food and move on to the next level through the exit. The food HUD and message between scenes are now also being displayed.
However, the enemies (which start spawning on day 2) are currently not moving or attacking the player …
The next tutorial will handle the enemy mechanics.


